
This will show you how to change most or all of the default fonts in Windows 7 for Active Title Bar, Icon, Inactive Title Bar, Menu, Message Box, Palette Title, Selected Items, ToolTip, and various Dialog Box text and buttons.
Note: Changing a Windows 7 font doesn’t change your program fonts.
Instructions:
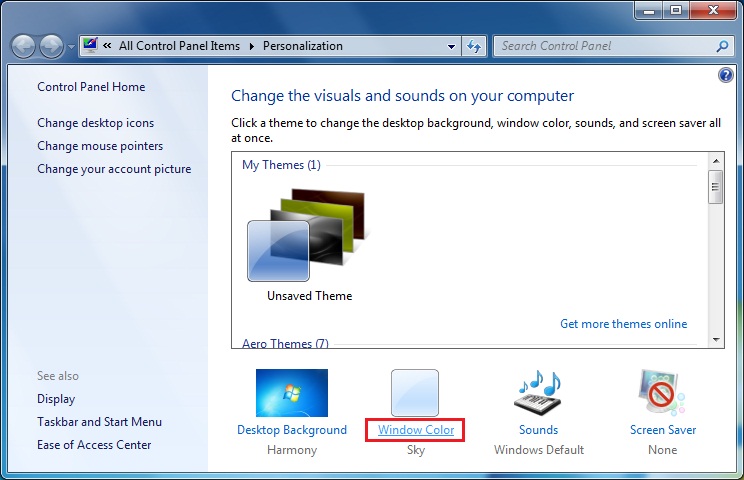
- Right click on a empty space on the desktop and click on Personalize.

- Click on the Window Color link at the bottom of the window.
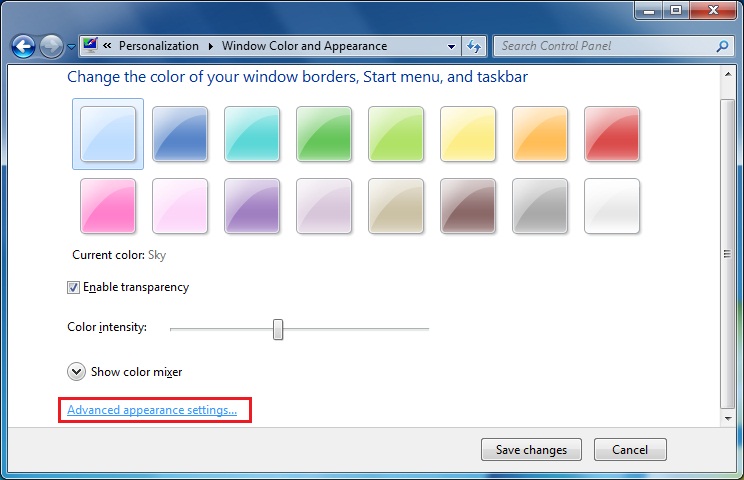
- Click on the Advanced appearance settings link.
- Select a Item that you want to change the font for, not all of these items will have a font for them.
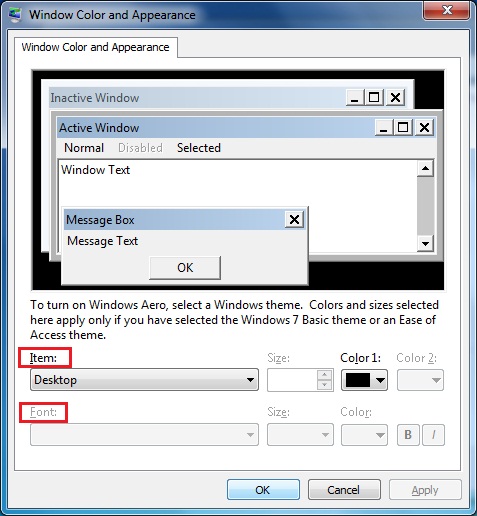
- To Change the Item Font – Click on the Font drop down menu and select a font.

- To Change the Item Font Size – Click on the Size drop down menu and select a number for the size. The higher the number, the larger the size.
- To Change the Item Font Color – Click on the Color drop down menu and select a color.
- To Have the Item Font in Bold – Click the B button to highlight it. If it is not highlighted, then the font will not be in bold.
- To Have the Item Font in Italic – Click on the I button to highlight it. If it is not highlighted, then the font will not be in italic.
- Repeat the above steps until you have changed all of the fonts for the items that you wanted.
- When done, click on OK.
Leave a Reply